Categories > Guides and Tips
Everything You Need to Know about Mount Logan in Yukon Territory

- Where is Mount Logan?
- How to Get to Mount Logan
- Things to Know Before Climbing Mount Logan
- Best Time to Climb Mount Logan
- How to Climb Mount Logan
- Step 1: Start training for the climb
- Physical Preparation
- Mental Preparation
- Step 2: Prepare your gear and equipment
- Step 3: Travel to Yukon Territory
- Step 4: Meet with your guide
- Step 5: Fly to the base camp
- Step 6: Start your climb
- What are the climbing routes in Mount Logan?
- King’s Trench
- East Ridge
- What You Need to Know Before the Expedition
- Duration of the Climb
- Minimum Group Size
- Permits and Insurance
- Deregistration
- How much will a Mount Logan expedition cost?
- Budget-Saving Tips for Your Mount Logan Expedition
- What You Need for a Mount Logan Expedition
- Where to Stay in Yukon
- Mount Logan Ecolodge & Retreat Center
- Northern Lights Resort & Spa
- Mount Logan Expedition Sample Itinerary
- Safety Tips for Expeditions in Mount Logan
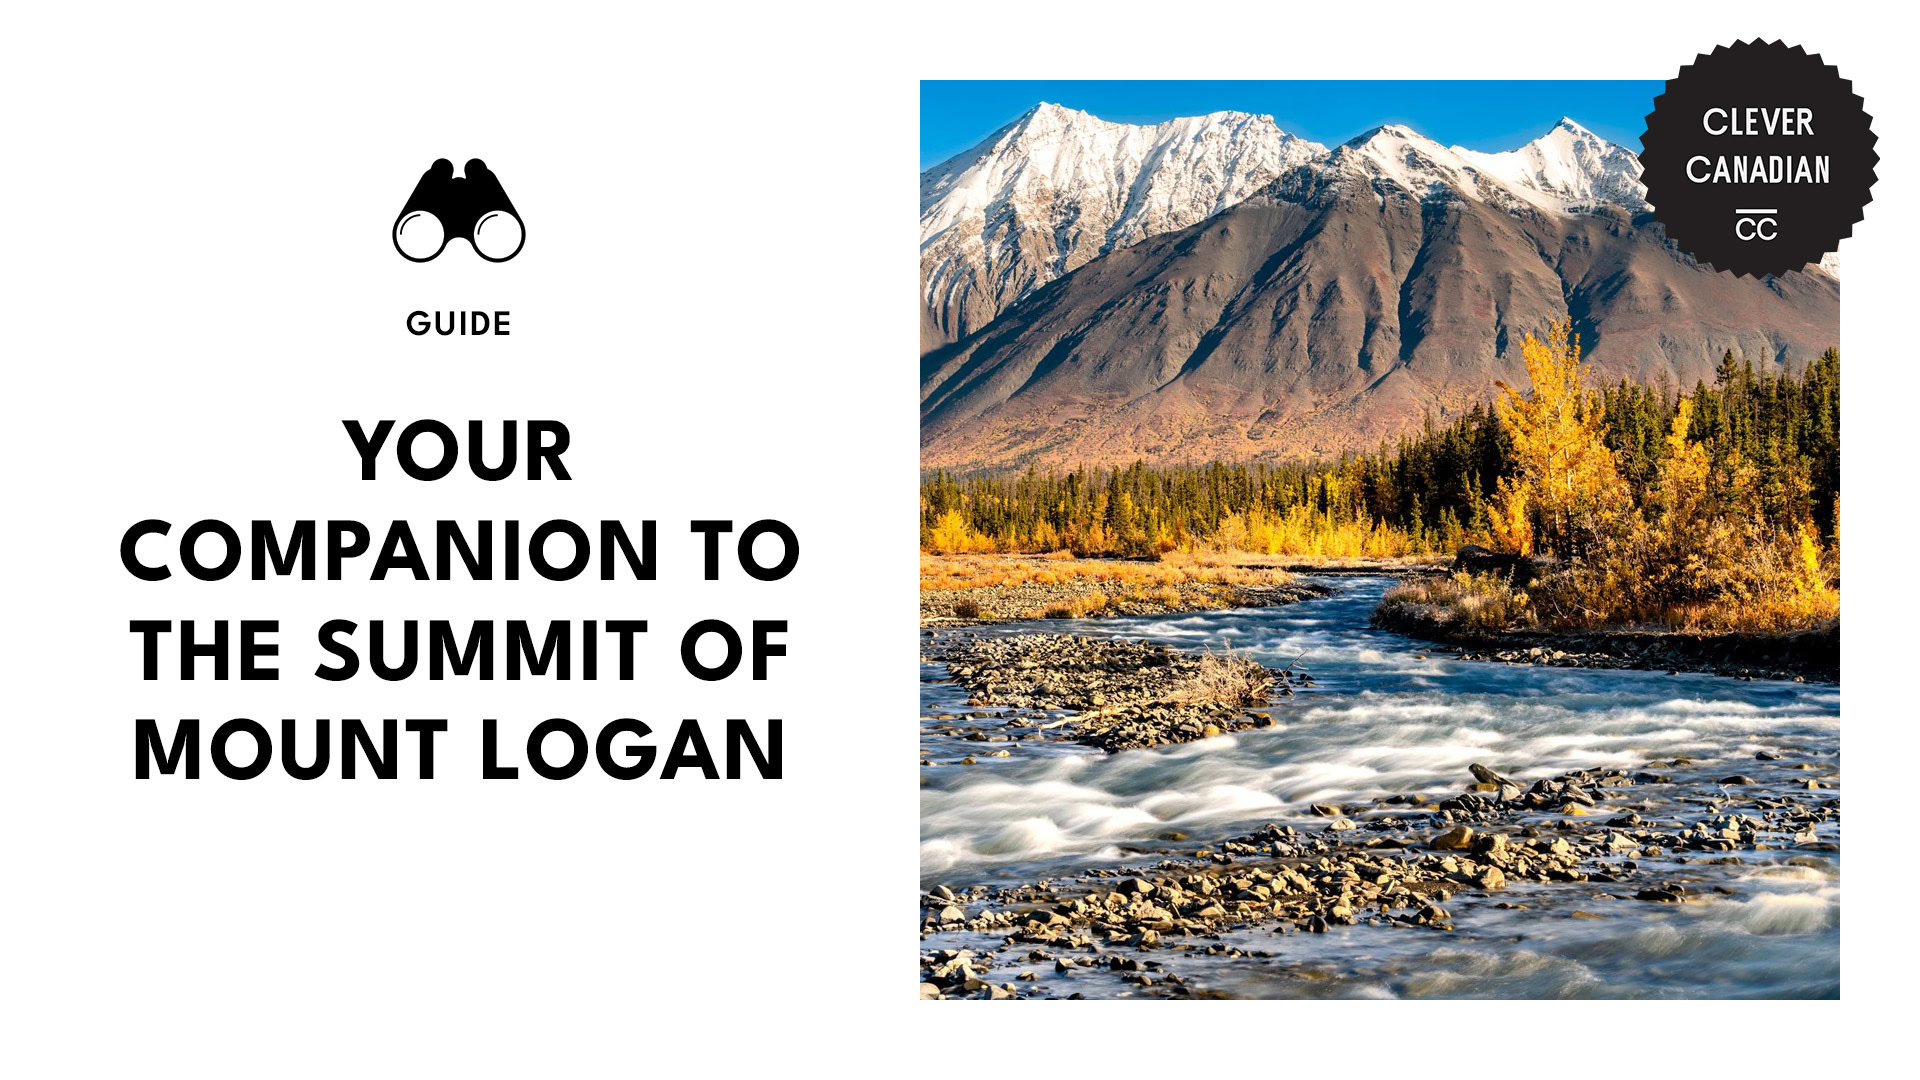
There’s a natural wonder in Canada that’s not easy to reach but when you do, oh man, you’ll be the talk of the town! Mount Logan, the highest peak in the country, is a bucket list destination for mountaineers!
Climbing this tall gem is a different kind of accomplishment, even though probably less than half have reached the summit (I know I haven’t!). It’s very remote and challenging, but it sure is fulfilling and ridiculously special.
If you’re thinking of reaching the summit of Mount Logan, you need to know a few things. Here’s a companion for this expedition of a lifetime, complete with a preparation guide, budget-saving tips, and everything in between!
Where is Mount Logan?
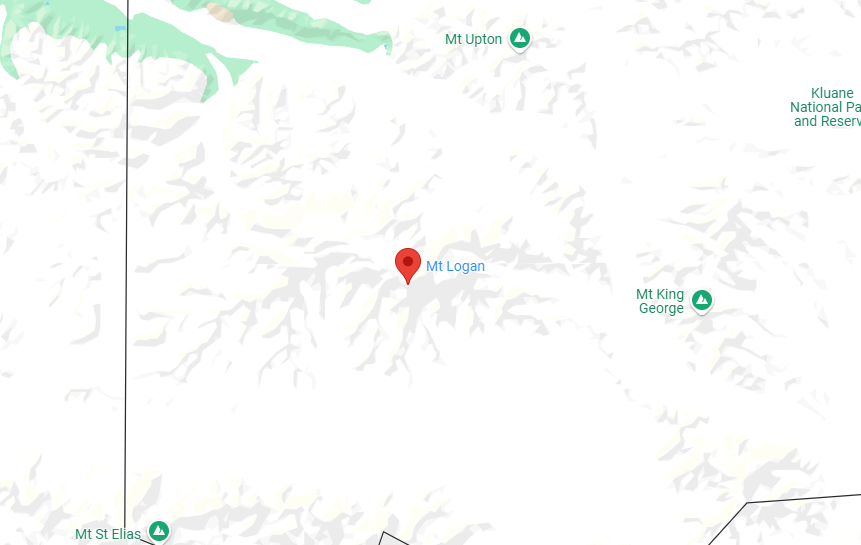
Mount Logan is located in Kluane National Park and Reserve in Yukon Territory, Canada, just 40 km north of the border of Alaska, USA. It’s part of the St. Elias Mountain Range.
How to Get to Mount Logan
Plane: Mount Logan is very remote. That’s why you have to book an air charter service or a flight to the nearest town/community.
Air North, Yukon’s Airline, offers flights to Whitehorse (the closest city to Mount Logan) from Calgary, Edmonton, Toronto, Vancouver, and other Canadian cities. Meanwhile, Haines Junction Airport is the closest and main entry point to Kluane National Park.
Car Rental Service: To get to where you need to go, book a car rental service at Erik Nielsen Whitehorse International Airport—there are three options: Fox Rent A Car, Driving Force, and Budget. Alternatively, you can ride a bus or take a taxi.
Things to Know Before Climbing Mount Logan
Height: 19,551 ft (above sea level)
Elevation: 19,500 ft
Mount Logan is Canada’s highest peak and second-highest in North America, just after Denali in the Alaska Range. It’s the start of the Hubbard Glacier in Alaska, which is the largest tidewater glacier in North America.
It’s also part of the largest non-polar icefield in the world, given its location in the Icefield Ranges of St. Elias Mountains in Kluane National Park and Reserve (a UNESCO World Heritage Site).
Mount Logan is very remote and the weather conditions are very extreme due to its geographical location.
And because of its sub-arctic weather and location, it’s not climbed as often as you’d think. There’s a yearly average of 25 people who aim to reach the summit.
The highest number recorded was in 2017, when 54 people in 16 expeditions attempted to reach the highest peak (and not many made it to the top). In fact, there’s a low success rate of reaching the summit.
Best Time to Climb Mount Logan
The best time for a Mount Logan expedition is around May to August. These months provide the best conditions for climbing this snowy mountain, especially since the weather is very erratic.
But you should know that storms are common in Mount Logan (yes, even in the summer). It’s almost like you need to be very lucky—and pray to the weather gods—to reach the summit without encountering too many bad weather conditions.
Expeditions in the Icefield Ranges are not allowed from November to early April (exact dates may vary).
How to Climb Mount Logan
Step 1: Start training for the climb
Media credit: samueltellier
Climbing the second-highest peak in North America requires more than just good equipment. Not only do you need to prepare physically but also mentally so you can handle the challenges that may come your way.
Physical Preparation
Train your body at least six months before your expedition, but generally, longer is better. For Mount Logan, a challenging and high-altitude climb, it’s ideal to start at least a year in advance or even a little more than that.
Do note that this still depends on your fitness level. Mountaineering is not only about climbing to the summit—you need endurance and strength since you’ll be carrying heavy gear, building a campsite, and ascending at high altitude.
High altitude equals low oxygen levels, which can lead to altitude sickness. Symptoms include fatigue, headache, lethargy, and loss of appetite.
So, it’s strongly recommended you get a physical checkup to make sure everything’s in order. You should also consider looking for a personal trainer who can help with your regimen, especially if you’re not used to really high peaks or need some help.
Mental Preparation
Just because you’re physically fit doesn’t mean your mind is prepared as well. It’s best to commit to training way longer because it can also help you mentally—you have a high-altitude goal, so you must know what you’re getting into.
Physically training for six months or more can also prepare your mind because you’re getting ready on a regular basis. Motivate yourself and stick to a positive mindset!
Step 2: Prepare your gear and equipment
Media credit: tobinseagel
Climbing Mount Logan requires complete gear and equipment. Your group is alone on the snowy mountain, so you must unleash your inner scout!
You’ll need camping, mountaineering, and personal gear, as well as food. But before heading to the store to purchase the essentials, talk to your guide regarding your equipment because some essentials may be included in the tour.
Remember that they’re the experts here, so check in with them and ask for a checklist to ensure you have everything you need for the climbing route you’re taking.
Step 3: Travel to Yukon Territory
Media credit: flyairnorth
Once everything’s ready, it’s time to fly to Yukon! You can book a car rental or contact your private transfer if your hotel or tour guide offers it.
Make sure you have accommodation booked before heading out!
Step 4: Meet with your guide
Media credit: alpineislands
Normally, you’ll meet with your guide before officially starting the climb. This is like a briefing to explain what will happen and what may happen during the expedition.
This is also the time to check your gear to ensure everyone is equipped. If you’re missing some stuff, this is a great way to pick up supplies at the last minute.
Always make sure you’re with a trusted guide for a Mount Logan expedition! To find licensed services that operate in the area, contact Kluane National Park and Reserve here.
Step 5: Fly to the base camp
Media credit: itsbigben
Flying to the Mount Logan base camp is weather permitting. Even though the conditions may be okay the night before, they can change drastically the next morning—flights are subject to frequent delays.
When you’re finally in the base camp, you have to be prepared to stay for a few days. Depending on the weather, you may have to camp for a couple of nights.
Step 6: Start your climb
Media credit: whererusteve
Start hiking once your group’s finally ready to ascend! Not all teams will use the same routes, and since this isn’t a frequently climbed mountain, there’s a high chance you won’t see other people around.
Expect to camp out for a few nights throughout the climb. Strong winds and altitude sickness will affect the rest of your expedition.
What are the climbing routes in Mount Logan?
There are two main routes to reach the summit of Mount Logan: the King’s Trench and the East Ridge. Both are not considered too technical because you’re not required to rock climb to reach the top.
1. King’s Trench
Media credit: isobelphoebus
The King’s Trench is the most common route, located on the west side, and is typically what mountaineer guides use. It was also the route used by the first climbers to reach the summit in the summer of 1925.
We don’t want to say it’s the easiest (because it’s not), but it’s not overly complicated as well. This is a high-altitude ski, so you need quality ski mountaineering gear.
Remember that you still need to be an advanced skier. Your descent will require skiing as well.
2. East Ridge
Media credit: brycebrownimages
This one is a little bit technical due to the high climbing, which is why it’s not usually the first choice. The base camp is at Hubbard Glacier, which is quite far from the route’s starting point.
In this route, you’ll walk on a steep and narrow ridge, which provides an incredible view. Expect some steep alpine wall climb and an approximately 60° ascent to reach the summit plateau.
What You Need to Know Before the Expedition
Duration of the Climb
Media credit: brycebrownimages
The average duration of a Mount Logan expedition is three weeks, and no, that doesn’t include your flight. The number of days you’ll stay on the mountain ultimately depends on the weather conditions.
Expect your estimated time to change because of the challenges posed by the mountain, like storms and whiteout conditions. The acclimatisation process will also affect the duration of your expedition—basically, it’s very unpredictable.
It’s actually common for climbers not to reach the summit, even after spending over a week ascending.
Minimum Group Size
Media credit: hollyskiwalker
Grab your mountaineering buddy because solo treks aren’t allowed anymore. There’s a minimum group size of two for Mount Logan because climbing solo is very risky.
There have been rescues for solo climbers in the past. And you should know that these are dangerous and very expensive—and taxpayers foot the bill!
Permits and Insurance
Parks Canada has rules for climbing Mount Logan, like permits and insurance. If you don’t fulfill the requirements, you won’t be allowed to go and your paperwork will take a while before it gets approved.
Anyone who wants to climb Mount Logan is required to have a mountaineering permit. Actually, it’s mandatory for the Icefield Ranges in Kluane National Park and Reserve.
To get this, you must apply at least a month in advance. Together with the application form, you must submit a copy of your planned route and present your proof of insurance.
Keep in mind that insurance is required for each climber. This is important because it will cover the cost of rescue, which does happen on Mount Logan.
Deregistration
Media credit: mbrantolson
After the climb, it’s required to deregister with the park staff, which you can do in person or via phone or email. This is to ensure every climber is accounted for.
Failing to do so means the park will start a search and rescue, which you may have to pay for. This mistake will set you back a tonne of money you surely don’t want to let go of—rescues typically cost a whopping $60,000 to $100,000.
How much will a Mount Logan expedition cost?
A Mount Logan Expedition costs around $11,000 to $12,000, depending on the service provider and inclusions. This typically includes park permits, some equipment, and flights to the base camp.
Budget-Saving Tips for Your Mount Logan Expedition
Media credit: pete.hoang
Mountain expeditions aren’t cheap. Aside from paying for your gear and possibly a personal trainer, you also have to arrange your finances because this will cost thousands of dollars!
If you’re looking to save on costs, check out the following tips that could help without compromising on safety:
- Mountaineering gear is expensive, so consider renting or borrowing from friends. Inspect the items because you don’t want to climb a mountain with broken gear.
- Join group exhibitions. The minimum group for Mount Logan is two, so check if there are providers that offer special prices for large teams.
- Check the inclusions in your booking. Compare the prices of the mountaineering guides while also looking at what’s included in the trip.
- Don’t buy all your gear at once. Your guide will usually include some equipment and food, so check that first before purchasing your complete essentials.
- Buy insurance—it’s a requirement for Mount Logan, anyway.
What You Need for a Mount Logan Expedition
To give you an idea, here’s a table with a list of essentials you must have for an expedition:
Where to Stay in Yukon
Mount Logan Ecolodge & Retreat Center
Media credit: mountloganlodge
Address: 103084 Alaska Hwy, Haines Junction
Contact: 867-634-2817, [email protected]
Pricing: $$
Website
Mount Logan Ecolodge is only a 13-minute drive from Haines Junction Airport, making it a convenient place to stay in the area. The best part is the peacefulness of the place—the perfect stop to reconnect with nature!
This gorgeous lodge in the Kluane region offers cosy rooms, cabins, yurts, pods, and a school bus converted into a small room (it’s like van life but without all the driving!). All rooms include breakfast, so that’s one less thing to worry about!
What’s even more awesome is the activities they offer, like flightseeing, dog sledding, and ice fishing. If ever your expedition gets cancelled (which we hope doesn’t happen), you can enjoy the rest of your time with guided tours at the ecolodge.
Northern Lights Resort & Spa
Media credit: northernlightsyukon
Address: 41 Gentian Ln, Whitehorse
Contact: 1-867-393-3780, [email protected]
Pricing: $$$
Website
Northern Lights Resort & Spa is in Whitehorse, which is a common meeting place for mountaineer guides. This is a luxury retreat that’s perfect for Northern Lights viewing (if you don’t mind splurging!).
Have a good night’s sleep at a chalet, available in alpine log and Aurora glass styles. The rooms are cosy and the location’s really good because you’re enveloped by a forest—it’s like your own little paradise, actually!
The location also gives you space for recovery. Since this is also a spa, you can get a massage to help with muscle soreness.
Mount Logan Expedition Sample Itinerary
Mountain guides will offer sample itineraries. However, this is just a template because the expedition will ultimately rely on weather conditions and the group’s abilities.
To give you an idea of what it will look like, here’s a quick example:
- Meeting for waivers, gear check, and to review the logistics.
- Day 1 – Shuttle to the starting point/town closest to the base camp and final checks.
- Day 2 – Fly to the base camp and tent setup. You may have to stay a few nights if the weather doesn’t cooperate.
- Day 3 – Begin the climb.
- Day 4 and the following days – Continue to ascend the mountain to the summit. Set up camp on certain days.
- Day 21/22 – Descent to the base camp.
There really isn’t a fixed schedule because many factors affect the climb. On some days, you might have to stay at the camp for more than a day, so even the duration of your expedition may or may not take longer.
Your guide will tell you about the conditions and the potential hazards. If the team cannot move forward due to natural occurrences, altitude sickness, or other factors, you have to descend back down.
Don’t worry. You’re not alone in not reaching the Mount Logan summit—reaching it is known to be very challenging! There’s always next time!
Safety Tips for Expeditions in Mount Logan
Mount Logan expeditions require careful planning to ensure a safe trip. Here are things you must know because safety is important!
- Double or triple-check your gear to ensure you have everything you need.
- Do your research. Talk with fellow climbers and ask about their personal experiences.
- Learn acclimatisation techniques because Mount Logan is really, really high!
- Know your limits and listen to your body. Let your group know if you’re feeling something unusual.
- Relay information to your group because miscommunication can stir up trouble.
- Don’t separate yourself from the group. Also, let your trusted family or friends know where you’re going.
- Learn first-aid in case of accidents.
- Have a clear plan in case things go awry—know who to call and what to do.


